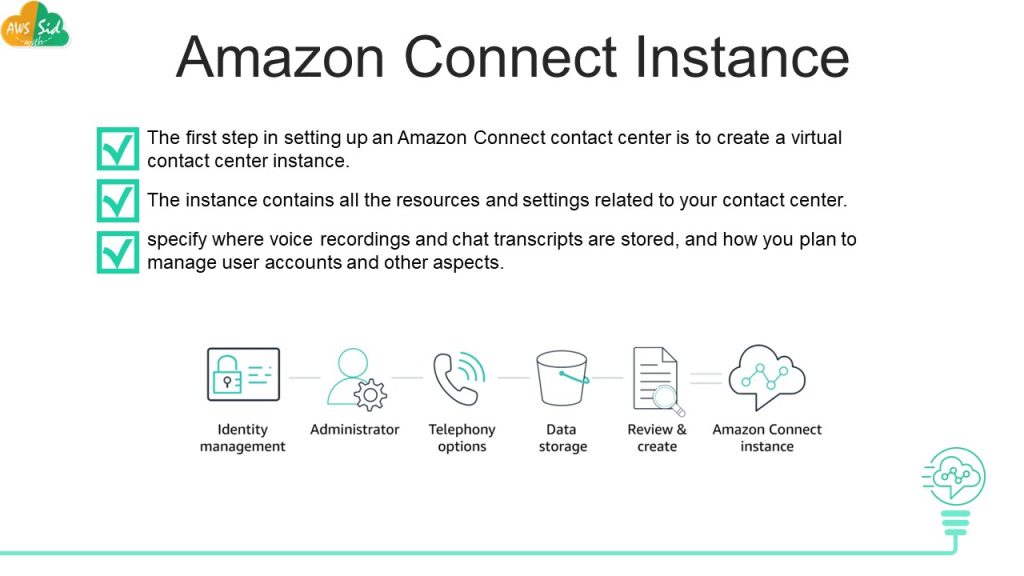
Create Amazon Connect Instance
To get started with Amazon Connect, you need to create an instance. In this blog post, I will guide you through the step-by-step process of creating an Amazon Connect instance.
Step 1: Sign Up for AWS
The first step in creating an Amazon Connect instance is to sign up for an Amazon Web Services (AWS) account. If you already have an AWS account, you can skip this step.
To sign up for an AWS account, go to the AWS website and click on the “Create an AWS Account” button. Follow the prompts to set up your account.
Step 2: Go to Amazon Connect Console
Once you have signed up for an AWS account, log in to the AWS Management Console. From there, search for Amazon Connect in the search bar, or navigate to the Amazon Connect console directly.
Step 3: Create an Instance
In the Amazon Connect console, click the “Get Started” button to create a new instance.
Amazon Connect offers several identity management options, including storing users within Amazon Connect, linking to an existing directory, and SAML 2.0-based authentication. These options provide businesses with the flexibility to choose the identity management solution that best fits their needs.
Identity Management
Identity management is an essential aspect of any contact center solution. With Amazon Connect, businesses have multiple options for managing identities and access control for their contact center users.
a) Store users with Amazon Connect
The first option is to store users directly within Amazon Connect. This approach provides a simple way to manage user access with separate credentials managed by Amazon Connect, as administrators can create, modify, and delete user accounts within the Amazon Connect console. This option is ideal for small contact centers with limited users.
b) Link to an existing directory
This approach allows businesses to manage user access through their existing identity provider, such as Microsoft Active Directory or AWS Directory Service. This approach is ideal for larger organizations that need to manage multiple user accounts across different systems
c) SAML 2.0-based authentication
Amazon Connect supports SAML 2.0-based authentication, which enables businesses to integrate their existing single sign-on (SSO) solutions with Amazon Connect. This approach provides a seamless way for users to access the contact center without the need to enter separate login credentials.
Telephony Options and Data Storage
When creating an Amazon Connect instance, you have telephony options to choose from, select both inbound and outbound to enable incoming and outgoing calls.
Call recordings, scheduled reports, and chat transcripts are stored in an S3 bucket. You can modify the storage location in the data storage options. Leave the default settings as it is unless you have a specific requirement to follow the naming convention for s3 buckets.
Step 4: Review and create
Review the final configurations and click on ‘Create Instance’.
Note: It’s important to note that once an Amazon Connect instance is created, the choice of identity management cannot be changed. It’s recommended to carefully consider the options and choose the one that best fits your business needs before creating the instance.